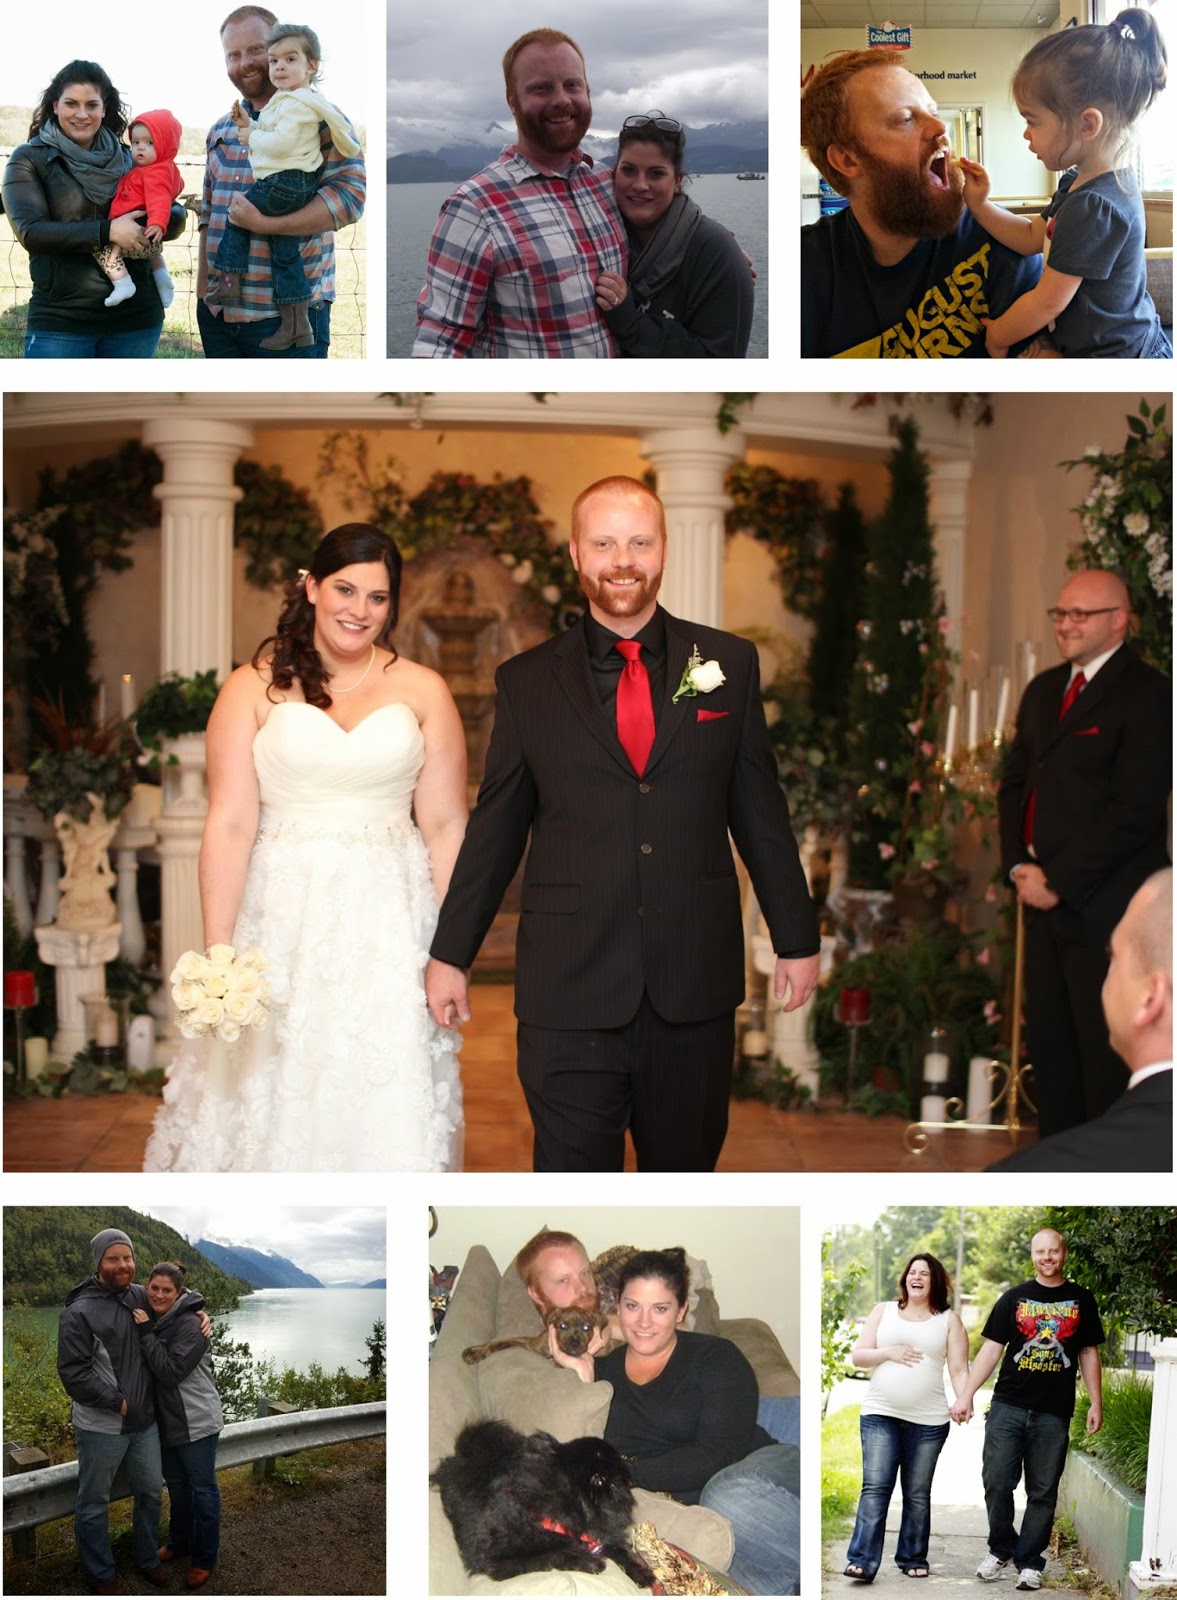
Husband - it's your 32nd birthday and I am so thankful to be the one by your side celebrating it! Thank you for choosing me 4 years ago as we walk through life together. Everything we've celebrated and endured are things I'm beyond grateful to have you holding my hand through. You're my rock and best friend and I still wake up so in love with you, thankful for the encouragement, support and laughter you bring to my life daily! You have my whole heart, let's stay young and in love forever, okay? Actually, scratch that…I like growing old with you! Let’s do that instead.
So I take literally NO credit for this recipe. This is 100% a creation of my husband whom NEVER cooks! But hey, if you have to start somewhere a Crock-pot is probably a good place to start right? He actually invented this a couple months ago when I had a sick day and it actually turned out really good! Win for the hubby! The ingredients are simple and there's nothing to turning the Crock-pot on LOW for 6-8 hours and letting it do all the work.
Then came Pintrest! Tons of posts from people all over creating their own DIY Headboards for a fraction of the cost of buying it online...immediately I knew I had to give it a shot, all I had to do was convince my amazing husband to help me, which of course because he's amazing he agreed to do!
First step was going to Lowe's, my total cost was around $30 and for that we got:
1. 1/2 inch Sheathing which the associates cut to 72" W x 42" H - $18.37
2. Flat Picture Hanging Kit - $7.96
After Lowe's we went to JoAnn's Fabric, total cost that I spent here was larger but that was to be expected $74.37 which included:
1. 4 yards of fabric which was 50% off, original cost was $16.99/yard but I got it for $8.49/yard (by the way 4 yards was WAY TOO MUCH! I could have gotten away with 3 yards) - $33.96
2. 1 can of spray on adhesive to keep the foam on the plywood - $10.99
3. 2 rolls of foam (2 1/2 yards per roll) - $13.73/roll
4. 1 roll of batting for a Twin Bed - $10.99
Okay, so we've got everything right? Right! Now how to do this with 2 kids running around? Then enters my saving grace, my Mother-In-Law, she lives right around the corner and she offered to watch the girls while David and I got the headboard done, so we dropped the girls off, came back home and got to work!!
1. Set the Plywood (Sheathing) on sawhorses
2. Layout your foam and make sure that it's all lined up. We ended up cutting ours into 4 pieces to make it easier to glue to the plywood. Once you have it where you want it, spray your adhesive and place your foam on top giving just enough pressure to make it stick. This stuff dried pretty quickly so we were happy we did it in sections.
4. Now onto your fabric...we chose a dark brown with some raised stitching on it that creates multiple diamond patterns, we were doing to do a plain fabric with tufted buttons but a texture seemed a little easier for our first try at this kind of project. Lay your fabric on top of the batting and again use your staple gun to secure it to plywood. We started with the bottom part of the headboard first then were able to keep the fabric tight while we stapled the top and sides.
5. We are heading into the home stretch now! It's time to attach your hanging method, we chose a flat panel instead of hooks but that was just what we chose to do. David helped me attach this to the back of the plywood and also into the wall using toggle bolts. I will mention here that when we went to hang this we needed the extra piece of plywood from when it got cut at Lowe's because of the foam on the back the panels wouldn't fit properly so we had to add the additional plywood then re-attach the hanging piece so it had enough room to stick out and snap together.
6. Now it's time to take your beautiful creation inside and hang it up on the wall! Here my friends is the final product! Love it! Looks great and I'm happy with it for being my first real DIY kind of thing. What do you think??
YAY! All done! I really do think it helped the room feel more pulled together. Because the stick on saying "Always Kiss Me Goodnight" was kind of crooked so we hung these little brown boxes I had above the headboard to make it look more even.
Extending a HUGE thank you to my hubby for all his help, I couldn't have done it without him and I really do like it! Hope this helped any of you who would like to do something like this. Next time I might attempt a tufted headboard (maybe for the girls rooms) but like I said this is a great job for a 1st attempt!
My next DIY project will be taking my husband's grandmothers antique mirror from brass and spray painting it white and roughing it up a little to give a vintage look to hang on our turquoise wall in our kitchen, so stay tuned for that!
I think it was about a month ago or so that my husband and I
were talking on Facebook with his cousin and her neighbor who live in
Mississippi about a Gumbo recipe, somehow I ended up googling Jambalaya
recipes, I think it was because they said a Gumbo is more soupy where a
Jambalaya is more thick, which is much more up my aisle. Also, it was the first time someone really
told me not to follow the recipe, “if you don’t like it, don’t put it in or
find a substitute you like” the gals told me, why had I never thought of
that? Usually if a recipe has something
in it I don’t like I won’t make it, this one thought changed how I cook…I went
on a mission for a Jambalaya recipe I could tweak and make my own, here is the
original version of the recipe I found for
Jambalaya.
I’ve made this about 4 times now, one time even for my
in-laws when they came by for dinner, it feeds between 3 to 4 people depending
on how much rice you add but it’s easily doubled if you needed to make more and
everyone seems to approve and says it doesn’t taste like it’s missing any of
the ingredients I left out. Below is my
Jambalaya recipe or as much husband screams when I make it “MAMA’S MAKIN’
JAMBABLAYA WHOOO HOOO!”
First I start off with about 1 or 2 tsp of Extra Virgin
Olive Oil in a large cooking pot (best if it’s non-stick type), I turn the
stove on about 4.0 on my stove (so medium-low heat). While the oil is warming up I cut this Johnsonville
Sausage, this one has a spicy taste to it so it gives a little kick. I only use about half of the package for my
version on this recipe, anything more it’s a little overwhelming. Once I cut the sausage in half I do small
slices, this helps it brown up a little easier.
After it’s all cut up I transfer the sausage into the pot with the oil
and let it cook for about 8 minutes until most of the pieces have a golden
crust on the edges.
While the sausage is cooking in the pot I cut up my veggies, I use about ½ a white onion and a whole green pepper (sometimes I’ll add red pepper too, just depends what I have on hand) I cut these veggies as fine as I can get them. Once the sausage is browned on the edges I remove it into a small bowl next to the stove, next in goes the veggies…these need to soften up for about 5-8 minutes, they will take on a little of that brown color from the sausage that I just cooked up.
Once the veggies are nice and soft I add in one small tomato
pasta can along with 2 ½ -3 cups of chicken broth (again this can vary it just
depends on if you like a thicker texture or more soup like), once those 2
ingredients are mixed in you will have what looks essentially like tomato
soup…bring this to a rolling boil (takes only 2 or 3 minutes). I also add in a special mixture of spices (I
measure by my palm so this is all guestimation) I add in ¼ - ½ teaspoon of red
cayenne pepper, season all, black pepper, garlic powder and onion powder.
Once the soup is at a boil bring it down to a simmer and add
in 3 bags (or 2 cups) of easy cook rice.
I prefer the bags because there’s no measuring, just cut the tops and
pour it in, also I add back the sausage that I put to the side earlier, cover
and the rice should cook up in about 10 minutes.
I usually already have my lemon cut in half and de-seeded
(there’s always a straggler) and my frozen jumbo shrimp set out, I buy the
pre-cooked, de-shelled, de-veined shrimp at the store but you could add fresh
if you wanted to. Once the rice is
mostly cooked and the Jambalaya is really coming together with a thicker
texture add in your shrimp and squeeze in the lemon juice on top. Give everything a nice stir and cover again for
about 5 minutes (shrimp don’t take long to cook up).
You can serve this on a plate, in a bowl or however you’d
like, you can garnish (we’re not that fancy around here) or add in more hot
sauce like my husband does.
Occasionally, I will add some garlic toast but most of the time this
meal is enough to stick to your ribs on its own.
Oh and my husband wanted me to let everyone know…this is
100% husband approved!